
The Essential Guide: 5 Ways to Make Quick Pickled Vegetables and Master the Brine Science
Tangy, bright, and intensely flavorful pickled vegetables are one of the simplest and most rewarding ways to add a vibrant zest to almost any favorite dish. Unlike traditional canning recipes, which demand sterilization, water baths, precise pH levels, and hours of work, quick-pickled vegetables—also known as refrigerator pickles—are ready to enjoy in under 30 minutes, relying only on the power of a hot acid brine.
Once you master the fundamentals of quick pickling, you gain the power to preserve and enhance almost any vegetable in your refrigerator. The process is a culinary superpower: it transforms everyday ingredients, extends their shelf life, and provides a powerful flavor boost—all while requiring zero specialized equipment. Keep reading to learn the precise science behind the brine, understand the critical safety rules, and get inspired with 5 easy, high-impact quick-pickled vegetable recipes.
The Science of the Brine: How To Make Quick Pickled Vegetables
Quick pickling is an elegant process rooted in osmosis and acidity. It is much less complex than the process of traditional canning. Canning is focused on creating a long-term, shelf-stable vacuum seal by halting all bacterial growth; quick pickling simply slows bacterial growth significantly by creating an inhospitable, high-acid environment.
The Foundational 1:1 Pickling Brine Formula
All successful quick pickled vegetable recipes adhere to a fundamental, non-negotiable formula: Vinegar + Water + Sugar + Salt. Manipulating the quantity and type of these four elements allows for limitless flavor customization, but their purpose remains fixed:
- Vinegar (The Preserver): The high acidity (low pH) of the vinegar is the core preservative agent. It denatures bacteria and provides the signature sour flavor.
- Water (The Modifier): Water acts as a solvent for the sugar and salt, and critically, it dilutes the vinegar. A 1:1 ratio (equal parts water and vinegar) is the standard rule of thumb, but you can easily manipulate the pungency of your pickles: more vinegar equals a more pungent taste; more water results in a milder, less acidic taste.
- Sugar (The Balancer): Sugar is not essential for preservation, but it is crucial for flavor balance. It counteracts the harsh, sour bite of the vinegar, creating a more rounded, palatable profile.
- Salt (The Extractor and Flavor Enhancer): Salt, typically non-iodized pickling or kosher salt, draws moisture and flavor compounds out of the vegetables (osmosis) and enhances the flavor of all other ingredients in the brine.
The Essential Guide to Vinegar Selection
The type of vinegar used has a massive impact on the final flavor and color of your pickles. Always aim for vinegars with an acidity level (pH) of 5% or higher for safe pickling.
- White Distilled Vinegar: The standard workhorse. It is flavor-neutral, highly acidic, and preserves the natural color of the vegetables. Ideal for classic dill pickles or cauliflower.
- Apple Cider Vinegar: Provides a slightly fruity, mellow, and less harsh flavor than distilled white vinegar. Excellent for root vegetables and fruit-based pickles.
- White Wine/Red Wine Vinegar: Offers a complex, subtle fruitiness. Red wine vinegar is superb for pickling red onions and cabbage, as it deepens their vibrant color.
- Rice Vinegar: The mildest option, with a gentle sweetness. Perfect for Asian-inspired pickles like daikon or carrots where a strong acid punch is undesirable.
Advanced Flavor Layering Techniques
Once the basic brine is perfected, you can elevate your pickles using aromatic agents. Consider these additions:
- Fresh Herbs: Rosemary, dill, tarragon, or bay leaves added fresh to the jar.
- Whole Spices: Whole mustard seed, cumin seed, peppercorns, or red pepper flakes. For maximum impact, gently toast whole spices in a dry pan for 30 seconds before adding them to the brine; this activates their volatile oils.
- Root Aromatics: Smashed or sliced garlic cloves, sliced ginger, or turmeric root.
- Heat Additions: Sliced jalapeños, serrano peppers, or a pinch of cayenne.
⚠️ Safety & Shelf Life: Refrigerator-Only Rules
It is vital to understand that quick pickles are not shelf-stable. They must be stored in the refrigerator at all times. They rely on cold temperatures to significantly slow the growth of spoilage microorganisms, including mold and yeast.
How Long Do Quick Pickled Vegetables Last?
On average, quick pickled vegetables will technically stay fresh and safe for consumption for up to 3 months in the refrigerator. The high acidity and salt content make the environment inhospitable for harmful bacteria to multiply.
However, the real limitation is texture. Your pickles will inevitably start to lose their desirable crunch and become soft if they soak in the pickling liquid for too long. For the best flavor, texture, and crispness, we highly recommend using your quick pickled vegetables within 2–3 weeks. Discard immediately if you notice any signs of spoilage, such as mold, cloudiness, or a distinctly foul odor.
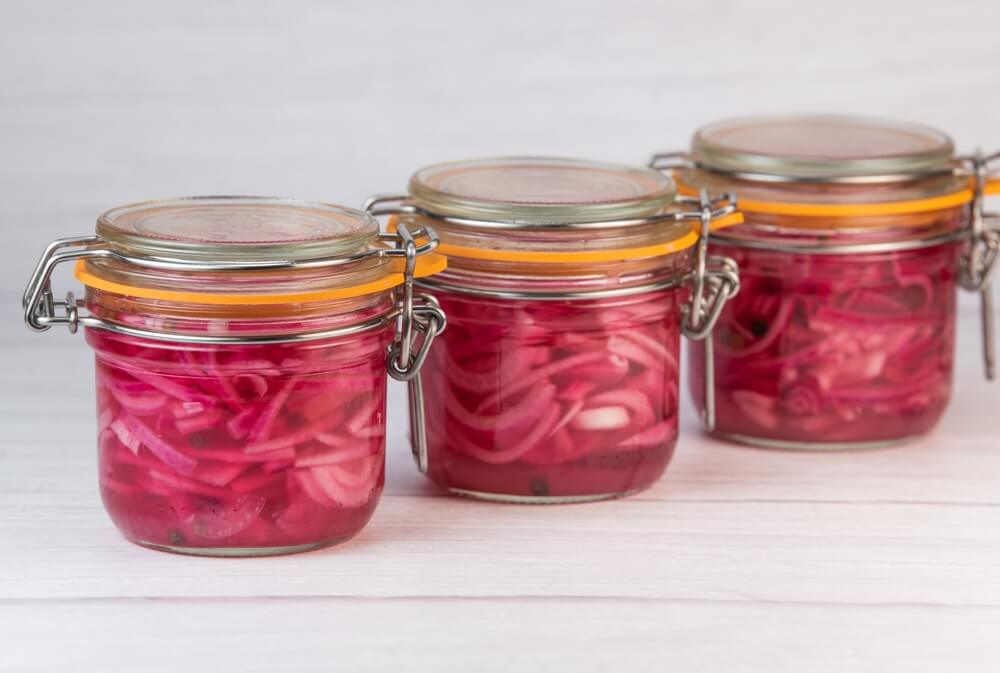
1. Quick Pickled Red Onion: The Ultimate Taco Topper
Quick pickled red onions are perhaps the most popular entry into refrigerator pickling due to their speed, simplicity, and vibrant color. They transform from sharp and harsh to beautifully balanced, tangy, and slightly sweet.
For this recipe, we suggest an advanced brine that uses a blend of apple cider vinegar and red wine vinegar. The apple cider vinegar provides a gentle sweetness, while the red wine vinegar adds an acidic punch and, crucially, enhances the onion’s natural pigments, resulting in that beautiful, bright reddish-pink color. If you prefer a non-colored onion, you can substitute the red wine vinegar with white distilled rice, white wine, or plain apple cider vinegar.
Ingredients:
- 1 large red onion, thinly sliced
- ¼ cup of apple cider vinegar
- ¼ cup of red wine vinegar
- 1 cup warm water
- 1 tbsp sugar
- 1 tsp salt (Kosher or Pickling)
- 1 clove of garlic, smashed
Instructions:
- Preparation: Slice your red onion into thin half-moons. For a great crunch, cut thicker slices. If you use a mandoline, be cautious to achieve thin, uniform slices for quick pickling.
- Packing: Stuff your onion slices and the smashed garlic clove into a clean, tightly sealable mason jar.
- Brine Creation: In a separate container, combine your water and both kinds of vinegar, stirring in the sugar and salt until fully dissolved. The use of warm water is key here, as it ensures the dissolving process is rapid and complete.
- Pickling: Pour your mixture over the onions in your jar. Ensure the liquid fully covers all of the onions—submerging them is essential for safety and preservation.
- Wait & Store: Let the jar sit for just one hour at room temperature for the initial flavor infusion, then cover and store it in the refrigerator for up to 2 months.
Serving Suggestions: The Versatility of Pickled Red Onion
There are so many ways to enjoy quick pickled red onions. Their tangy profile cuts through rich, fatty, or savory dishes, making them essential:
- Mexican Cuisine: They are the perfect topping for street tacos, pork carnitas, or cheese quesadillas.
- Mediterranean Dishes: Excellent when added to grain bowls, hummus plates, or gyros.
- Everyday Favorites: Add them to sandwiches, salads, or avocado toast for an extra burst of flavor and color.
2. Quick Pickled Jalapeños: Taming the Heat
If you find raw jalapeños too spicy, this quick pickling recipe is a game-changer. The acidity of the vinegar works to tame the fiery capsaicin while infusing the peppers with a tangy, slightly sweet flavor.
Ingredients:
- 3–4 jalapeños, sliced into thin rounds
- ½ cup water
- ½ cup of white distilled vinegar
- 2 tbsps of sugar
- 1 garlic clove, sliced
- ¼ tsp of whole black peppercorns
- 2 pinches of salt
Instructions:
- Preparation: Wash your jalapeños and cut them into uniform thin rounds. Pro Tip: If you desire less spice, use a spoon or paring knife to remove the internal white pith and seeds before slicing. The vinegar will naturally pull out some of the heat, even if the seeds are left in.
- Packing: Place your slices into a clean jar along with the sliced clove of garlic and peppercorns.
- Brine Heating: Combine your water, vinegar, sugar, and salt in a small saucepan, stirring until the sugar and salt dissolve.
- Boiling Point: Place your saucepan on the stove over medium heat and bring it to a rolling boil.
- Pickling: Immediately remove the brine from the heat and pour it over your jalapeños until they’re fully submerged. Crucially, do not simmer or boil the jalapeños themselves in the brine; the residual heat from the boiling liquid is enough to soften them slightly without destroying their texture.
- Cool & Store: Let the contents of the jar cool completely at room temperature, then cover, seal, and keep refrigerated for up to 2 weeks for peak crispness.
Serving Suggestions: Spicy, Tangy Additions
Quick pickled jalapeños offer a balance of heat and tang that pairs wonderfully with fatty or rich foods:
- Tex-Mex Staples: Use as a classic topping for nachos, burritos, or tacos.
- Garnish & Condiment: Finely chop them and fold them into homemade salsa or guacamole to replace the acid from limes.
- Sandwich Boost: Try them as a burger topping or to give your sandwiches and subs an extra layer of complexity and heat.
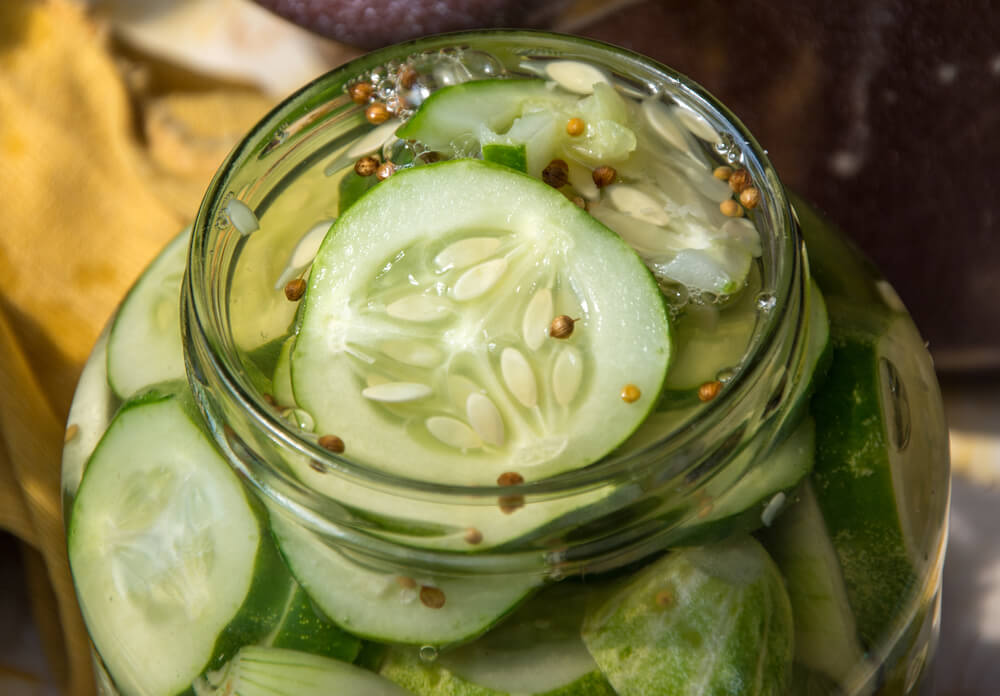
3. Quick Pickled Cucumbers: The Classic Crunch
No pickling guide is complete without the cucumber—the foundational image of a classic pickle. To successfully make quick pickled cucumbers that still retain a satisfying crunch, you must start with the right varieties.
We highly recommend using cucumbers with naturally thicker skin, such as Kirby, English, or Persian cucumbers, as these varieties usually hold up best against the brine liquid. Avoid soft-skinned, high-moisture slicing cucumbers often labeled simply as "garden cucumbers," as they become limp quickly.
Ingredients:
- 1–1 ½ cups of firm cucumbers, sliced
- ¾ cup white distilled vinegar
- ⅔ cup water
- 2 tbsp sugar
- 1 tsp salt
- ½ tsp mustard seed
- ½ tsp peppercorns
- 1–2 sprigs of fresh dill
- 1–2 cloves of garlic, smashed
Instructions:
- Slice & Shape: Slice your cucumbers by your preference: chips, spears, or ribbons. Uniformity helps ensure consistent pickling.
- The Crunch Secret (Optional but Recommended): For the ultimate crunch, place your cucumber chips in an ice bath for 20 minutes prior to pickling. This shock treatment draws out moisture and firms the cell walls. Pat them dry thoroughly and transfer them to the jar.
- Packing: Transfer your sliced cucumbers to a jar with the mustard seed, peppercorns, dill, and garlic.
- Brine Preparation: Combine your water, vinegar, sugar, and salt in a small saucepan and mix until dissolved. Bring this mixture to a boil over medium-low heat, and remove from heat immediately after it reaches a boil.
- Pickling & Cooling: Pour the hot brine over the contents of the jar and let it sit at room temperature for half an hour or until it’s cool.
- Storage: Cover with the lid and store in the fridge for up to 2 months.
Serving Suggestions: The Universal Condiment
Pickled cucumbers are arguably the most versatile quick pickle. They are a universal condiment:
- Deli Favorites: Perfect on burgers, cold-cut sandwiches, or served alongside deli meats.
- International Twist: With small variations in ingredients (e.g., adding ginger and sesame oil), you can adapt these cucumbers to enjoy with Asian or Swedish cuisines.
- Side Dish: Serve them chilled as a refreshing, palate-cleansing side dish.
4. Spicy Quick Pickled Radish: Color and Kick
Quick pickled radishes are intensely satisfying, offering a beautiful pink hue and a satisfying, crisp bite. This recipe includes a kick of spice, transforming the radish's inherent peppery bite into a sharp, tangy flavor with a lingering heat.
If you are not a fan of spicy foods, you can still follow the recipe. Just skip the red pepper flakes or substitute them for another ingredient like fresh dill or mustard seeds. If you omit the red pepper flakes, we recommend reducing the amount of sugar to 1 tbsp, as too much sugar without the pepper flakes won’t produce the required tangy-sweet balance that quick pickled vegetables are known for.
Ingredients:
- 8–10 radishes, thinly sliced
- 1 cup apple cider vinegar
- ¾ cup warm water
- 2 ½ tablespoons sugar
- 2 tsp salt
- ½ tsp red pepper flakes
- ½ tsp peppercorns
- ½ tsp cumin seed
- 2 cloves fresh garlic, sliced
Instructions:
- Slicing Precision: Thinly slice your radishes into chips. Any thickness will do. For thin, even slices that pickle uniformly, we highly recommend using a mandolin slicer (use extreme caution).
- Packing: Transfer your radishes into a jar with the peppercorns, cumin seed, and sliced garlic.
- Brine Dissolution: In a separate container, combine your vinegar, warm water, sugar, salt, and red pepper flakes. Stir vigorously until the sugar and salt are completely dissolved.
- Pickling: Pour your brine over the jar of radishes, ensuring all the contents are covered.
- Cool & Store: Let the jar cool at room temperature for an hour or until no longer hot. Cover and store in the refrigerator for up to 3 weeks.
Serving Suggestions: A Savory Crunch
Similar to many recipes on this list, your quick pickled radishes can be served on tacos, sandwiches, or in a salad. However, their crispness and heat make them unique additions to:
- Breakfast: Try them sliced thinly on avocado toast or as a garnish for scrambled eggs.
- Meat & Cheese Boards: They make a great, colorful counterpoint to rich cheeses and cured meats.
- Asian Dishes: Use them in place of pickled daikon for Banh Mi sandwiches or as a garnish for ramen.
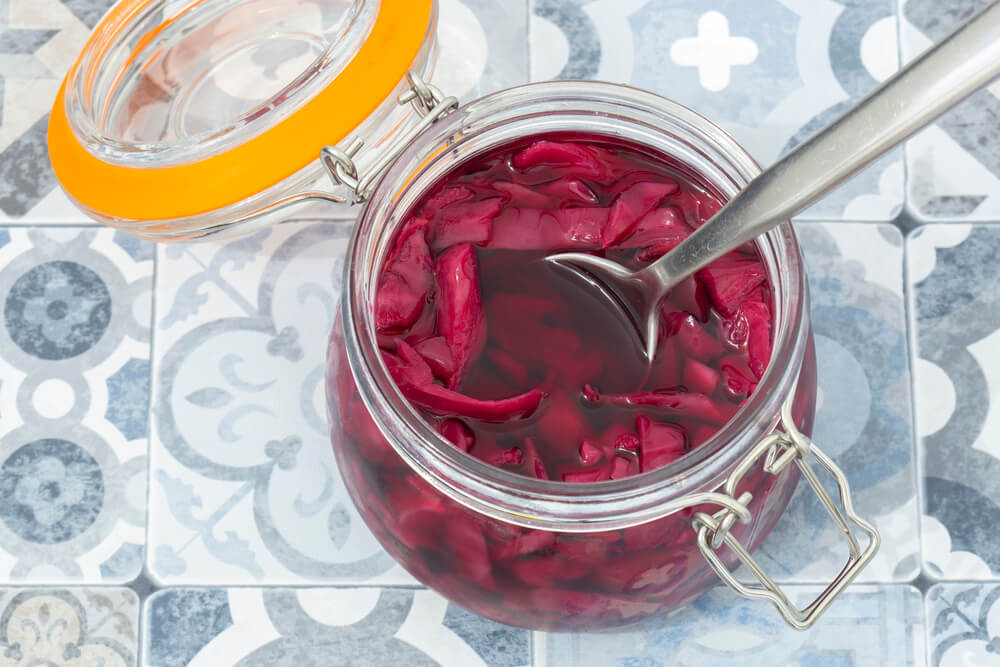
5. Quick Pickled Cabbage: The Universal Condiment
Pickled cabbage is an incredibly versatile and forgiving quick pickle. For the best visual color, use red cabbage for this recipe. The resulting deep pink hue adds a gourmet touch to any meal.
This recipe involves a brief heating of the cabbage within the brine itself, which slightly softens the tough fibers and speeds up the infusion process, making the cabbage ready to eat almost immediately after cooling.
Ingredients:
- ½ head of red cabbage, thinly chopped
- 1 cup apple cider vinegar
- 1 cup water
- 1 tbsp sugar
- 2 tsp of salt
- ½ tsp of peppercorns
- 1–2 cloves of fresh garlic, smashed
- Pinch of red pepper flakes
Instructions:
- Slicing: Slice your cabbage into thin, uniform strips (a mandolin or sharp knife works well here).
- Brine & Aromatics: Stir your vinegar, water, sugar, salt, peppercorns, garlic, and red pepper flakes together in a small saucepan and bring to a rolling boil on medium heat.
- Quick Infusion: When your pickling liquid reaches a boil, stir in your sliced cabbage for approximately one minute. This brief exposure to heat is critical for softening the cabbage fibers without cooking them entirely.
- Cooling: Remove from the heat and allow the entire mixture to cool completely at room temperature.
- Storage: When your pickled cabbage is cool, transfer it to a jar and cover it with a lid. Store it in the refrigerator for up to 3 weeks.
Serving Suggestions: The Best Condiment
There are plenty of creative ways to use your pickled cabbage; the key is to think of it as a brightly acidic, tangy condiment:
- Topper: Use it as a vibrant topper for tacos, pulled pork sandwiches, or brisket burgers.
- Side: If you are a fan of traditional coleslaw, you might enjoy your pickled cabbage on its own as a crisp, flavorful snack.
- Salads: Add it to green salads for texture and a clean, sharp dressing flavor.
❓ Interactive FAQ: Troubleshooting Your Quick Pickles
Here are expert answers to frequently asked questions about quick pickling, including tips on safety, texture, and flavor, presented in a dark-mode compatible interactive (accordion) format.
Loss of crunch is the most common quick pickling failure. The primary causes are using the wrong vegetable (high-moisture slicing cucumbers are prone to softening), or overcooking the vegetable. Expert Tip: Always use very firm vegetables, ensure your brine is boiling when added, and incorporate a step like the cucumber ice bath or a brief salt-curing before pickling. For cucumbers, adding tannins (a grape leaf or a pinch of pickling lime) can also help maintain crispness.
Yes, for quick pickles, you can safely reduce the sugar without compromising safety, as its role is only flavor balancing. However, you should never reduce the vinegar (acid) or the minimum salt required to draw out moisture and contribute to the high-acid environment. The 1:1 vinegar to water ratio is the minimum safety standard. If you must reduce salt, ensure the acid content remains high (e.g., use a 2:1 vinegar-to-water ratio).
No, you do not need to perform full, water-bath sterilization, which is required only for shelf-stable canning. For refrigerator pickles, simply washing the jars and lids thoroughly with hot, soapy water is sufficient. Because the high acidity of the brine and the continuous refrigeration environment inhibits bacterial growth, a meticulously sterilized jar is unnecessary.
The versatility is nearly endless! Excellent candidates include carrots, green beans, cauliflower florets, asparagus, okra, and even firm cherry tomatoes. The rule of thumb is: firm and low-moisture vegetables work best. Tender vegetables like zucchini tend to get too soft too quickly, but firmer options offer a better crispness that lasts longer in the refrigerator.
A brine that is slightly cloudy immediately after preparation or within a few days is usually harmless. This cloudiness is typically caused by starch escaping the vegetables (like carrots) or sediment from non-distilled vinegars (like apple cider vinegar). However, a brine that becomes thick, slimy, or highly opaque and milky, accompanied by an off-odor, visible mold, or fermentation bubbles, is a definite sign of spoilage, and the pickles must be discarded immediately.
✅ Conclusion: Your Kitchen, Now Preserved
Mastering the quick pickling process opens up a world of flavor, allowing you to create sharp, crunchy, and customizable condiments in minutes. By understanding the simple science of the 1:1 brine ratio and strictly adhering to the refrigeration-only rule, you can transform vegetables and elevate everyday meals with minimum effort and maximum impact. Start experimenting with different spices and vinegars today—your refrigerator is now your personal fermenting lab!
Post a Comment for "The Essential Guide: 5 Ways to Make Quick Pickled Vegetables and Master the Brine Science"